Showing posts with label baked. Show all posts

Tuesday, January 25, 2011

Eggplant Rollatini

It's been a few posts since my last eggplant recipe, so enter the Eggplant Rollatini post.  I am actually shocked I haven't blogged about this recipe already-- it's one of my favorite dishes! It seems like a fancy presentation but it's actually pretty simple. You've heard me say this before, but I'll say it again: in lieu of pasta, pair with the vegetable of your choice. I opted for steamed broccoli.  The dish is pretty heavy in itself and it wont hurt to skip the extra carbs.  If you absolutely have to have the pasta, opt for whole wheat for the extra fiber.  

Eggplant Rollatini (serves 4)
1 medium eggplant, peeled
1/4 cup all purpose flour
1/3 cup bread crumbs, Italian Style
1 egg (beat w/ about 1/4 cup water)
3/4 cup part-skim ricotta cheese
1/2 cup shredded mozzarella cheese, reduced fat
1/2 package frozen spinach, cooked and drained 
1 egg white
garlic powder
onion powder
dried parsley 
fresh basil --optional
tomato sauce --either homemade or jarred

Preheat the oven to 350 degrees.  After you peel the eggplant, cut it the long way into 8 even slices.  At the store, try to pick a shorter eggplant--if it's too long they will be awkward to roll. 
Next set up a breading station: flour mixed with garlic and onion powder (a hefty shake of each) on a plate, egg and water beaten in a wide bottomed dish, and bread crumbs on another plate.  Spray a baking sheet with cooking spray and start breading the eggplant like this...
1) flour it, shake off the excess
2) dip it in the egg
3) dip it in the bread crumbs

Lay the eggplant onto the sprayed baking sheet and bake for approximately 15 minutes or until the eggplant softens a little.  It'll get cooked again-- this first time is to just get it soft enough to roll up (keep the oven on).  While the eggplant is baking, prepare the filling.  In a bowl, mix the ricotta, mozzarella cheese, egg white and spinach.  Make sure you cool the spinach before you add it to the mix, you don't want to cook the egg white!  Add a little more garlic and onion powder.  The sauce I used is already loaded with garlic so I held off on adding fresh garlic, but that would be perfectly acceptable.  If you have fresh basil, that will only make it better (I didn't have any, sad day!).  I also added a little bit of parsley flakes to the mix. 
Spray a baking dish with a little cooking spray (I lined w/ tin foil). When the eggplant is out of the oven, spoon an even amount of filling --roughly a 1/4 cup to the end of the each slice and roll up.  Place in the baking dish with the ends down.
1) add the filling
2) roll it up, ends down
3) repeat x7

Bake in the oven on 350 degrees for another 15-20 minutes, until the filling is bubbly.  Top with tomato sauce, sprinkle some grated cheese on top if you like and embark on the delicious journey that is eggplant rollatini! 


Tuesday, January 11, 2011

guiltless buffalo chicken finger salad.

I wish I could preface this recipe by boasting about all of it's amazing health benefits, but unfortunately there is not much to report... we are talking about buffalo chicken, people.  But what this recipe lacks in nutritive value, it gains in flavor!
I always try my hardest to make foods that pack a nutritive punch.  But sometimes it's more important (and gratifying) to simply tweak a few ingredients to lessen the caloric blow whilst retaining the familiar taste.  I did just that with this recipe.  Now I know this recipe is very simple, in fact -- I almost feel as if I am insulting you, my faithful reader just by posting it.  But my hope is that you'll learn something that you maybe wouldn't have thought to do yourself and if nothing else, you have an awesome buffalo chicken salad recipe (trust me)!

Buffalo Chicken Salad (serves 4)
1 lb skinless, boneless chicken breast --I bought the tenders which cut down on prep time
1/3 cup bread crumbs
2-3 tbsp whole wheat flour
a hefty shake of garlic powder, onion powder, and chili powder
1 egg
1-2 tbsp fat free milk
1/2 cup buffalo sauce (I bought Aurthur Marc's Mild Buffalo Wing and Dipping Sauce)
8 tbsp crumbled blue cheese, divided
8 tbsp Ken's light blue cheese dressing, divided
1 large head iceberg lettuce 
2 medium tomatoes, diced
6 large stalks celery 
 First start by creating a breading station.  On one plate, add the whole wheat flour and spices.  I added a generous shake (less than a full tsp of each) garlic powder, onion powder, and chili powder, mix together to blend.
In a wide shallow dish, add one egg and the milk and beat together.  My mother always told me that when you a breading and baking, you use egg and milk, but if you are breading and frying, then use egg and water... I am not sure exactly why, but I (almost) never question her methods.  
In another dish add the bread crumbs.  I only had Italian style bread crumbs so I added a bit more chili powder to it.  Plain bread crumbs or panko bread crumbs would work really well too. 
Keep a big empty plate handy for the finished chicken. If you haven't already, cut the chicken into strips, I bought a 1 lb package of chicken tenders, which had 8 pieces, 2 per serving-- I love having the prep work done for me!
To bread the chicken, simply follow these steps:
Step 1: roll each chicken strip into the flour, shake off the excess
Step 2: dip the floured chicken strips into the egg wash, shake off the excess


Step 3: lastly dip the chicken into the bread crumbs, shake off the excess
Step 4: lay the breaded chicken on a baking sheet or stone
Preheat the oven to 375 degrees and bake uncovered for 20 minutes.  After 20 minutes, cut the largest piece, if it is still pink, bake for another 5 minutes or until the flesh is white.  After baking, drizzle the hot sauce evenly on each piece. I finished the chicken off under the broiler for a minute or two, just to crisp up a bit. 
For the salad, I used only iceberg lettuce, diced tomato, and celery, divided equally into four.  Sure there are plenty of other lettuce varieties that have more minerals and vitamins than iceberg, but there are two exceptions I make for iceberg-- buffalo chicken salads and tacos!  When I chopped the tomatoes, I took out most of the seeds so there wasn't too much moisture in the salad.  And lastly, I chopped some celery, and left a few sticks as garnish. After dividing the salad onto four plates, top each one with two pieces (or 4 oz) of buffalo chicken, 2 tbsp crumbled blue cheese, and 2 tbsp light blue cheese dressing.  
This salad had a TON of flavor and was really filling! It'd make a great wrap too.  I hope you like it!


Monday, November 15, 2010

super simple baked ziti


Okay it's Monday night, I get it... you had a fabulous weekend, but it went by WAY too fast.  Now the dreaded Monday is here and your work day was painfully long.  The last thing you want to do is spend hours in the kitchen slaving away to make dinner.  Well then this is the recipe for you! Baked ziti is such a simple thing to whip up and it's a perfectly filling cold-weather meal. You could even whip one (or two) up on Sunday and pop them in the fridge or freezer for the week (pre-baked). 
I know what you're thinking... but all those carbs and fatty cheese!?  Well, good thing you are getting your cooking advice from a dietitian!  By using a high fiber pasta and light cheese, you can really healthify this classic dish.  Oh no, but you already had dinner tonight... don't worry, it makes a great Tuesday meal too!!

Baked Ziti (serves 6-8) 
1 box Ronzoni Smart Taste Penne or Ziti
1 jar of your favorite jarred sauce, or if you happen to have left over homemade
1 1/2 - 2 cups light mozzarella cheese 
1/2 cup part-skim ricotta cheese
3 garlic cloves 
1/4 medium yellow onion
1 tbsp olive oil
crushed red pepper (optional)

Start by boiling 1 box of pasta.  I highly recommend Ronzoni Smart Taste... no they are not paying me to say this.  This pasta has 6 grams of fiber per serving and tastes like white pasta, it's amazing!  You can cook it al dente, it'll cook more when it's baking.  Once it's cooked, set it aside, keep covered. 

I decided to doctor up my sauce a little bit.  Jarred sauce is not the first thing I go to, but if it is in a recipe-- not just spaghetti with sauce, then it's okay.  Homemade is always best but sometimes that's just not practical.  I bought the Trader Giotto's Organic Spaghetti Sauce with Mushrooms and added a few things to make it my own. 

If you choose to fancify your sauce, finely chopped three large cloves of garlic and about 1/4 of a medium yellow onion.  In a deep sauce pan heat 1 tbsp olive oil.  Then add the garlic and onion to the pan on low heat.  You don't want them to brown, just get soft.  Once the onions start to turn translucent, add 1 jar of sauce of your choice.  I like to add about 1 tsp of crushed red pepper for a little heat.  Let this cook on low, covered for 15-20 minutes.  

Preheat the oven to 350 degrees. Next add the penne/ziti to a 9 x 13 inch baking dish.  Pour all of the sauce over the pasta and mix.
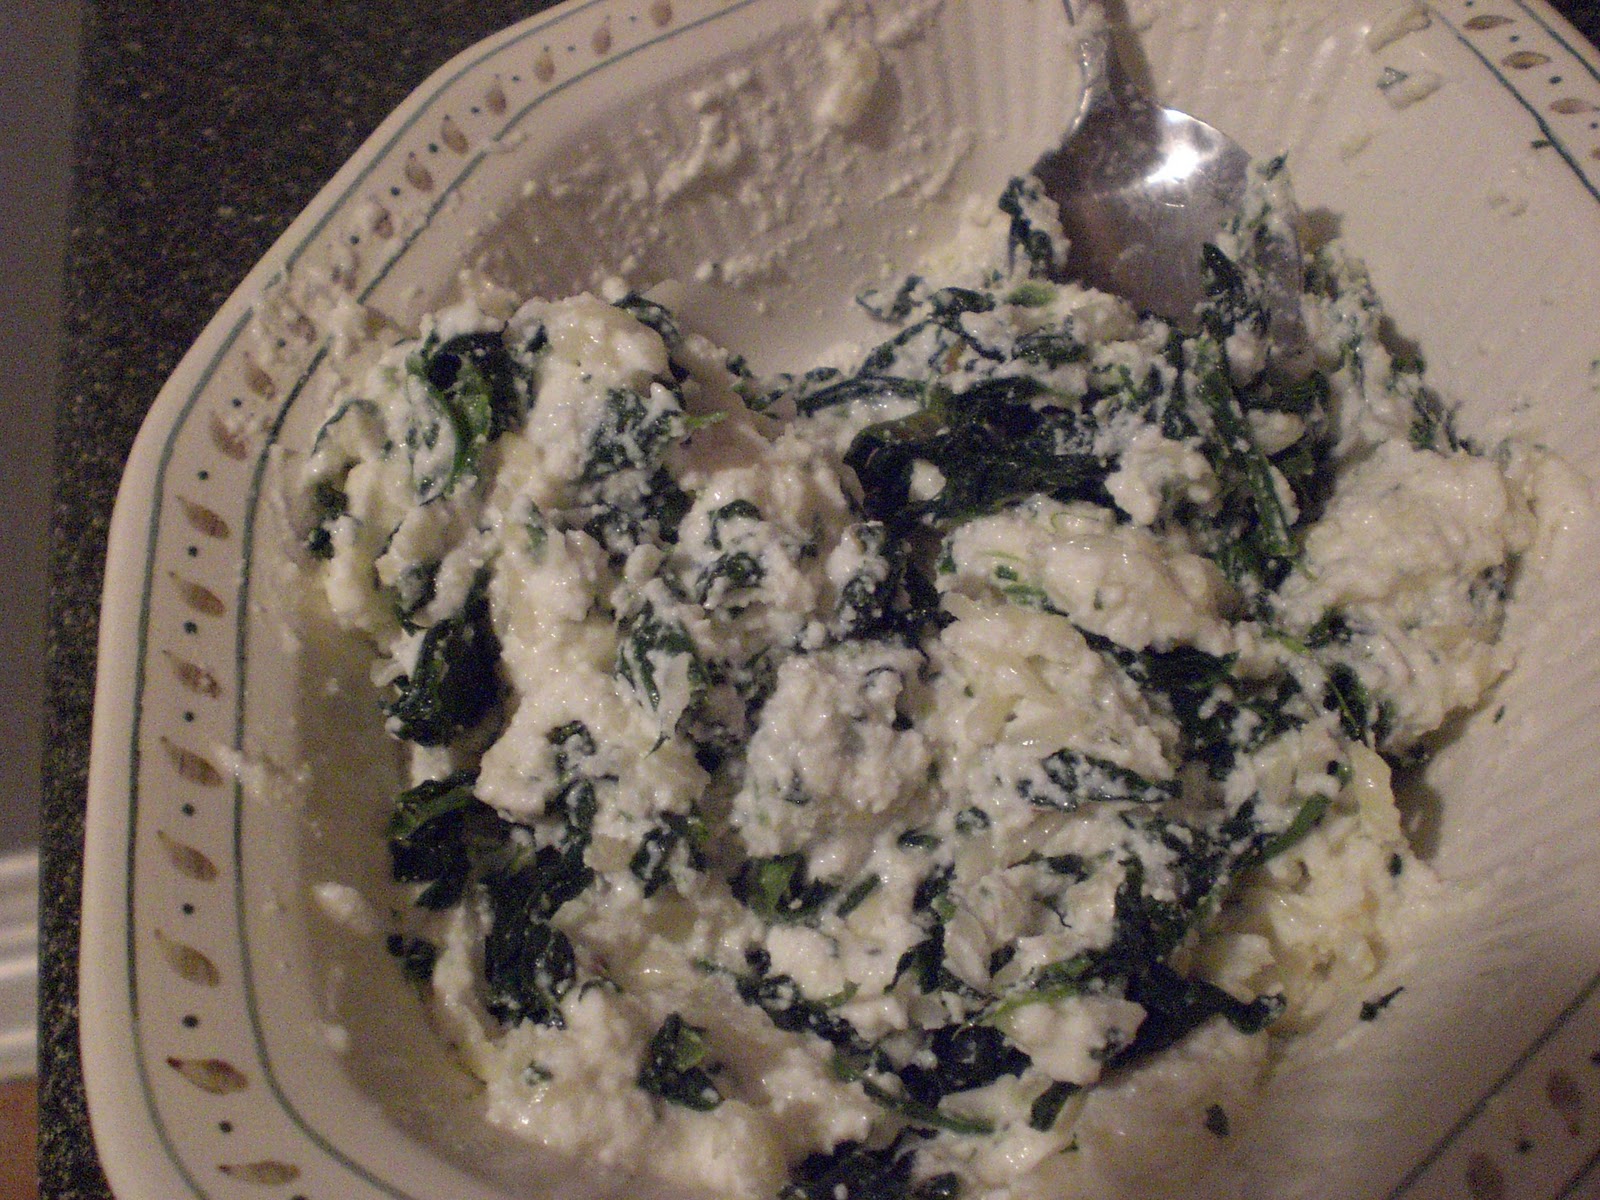
Measure out 1/2 cup ricotta cheese.  Add to the dish in bits and stir to blend.  Lastly, add 1 cup shredded mozzarella cheese and stir to blend.
Bake in the oven for about 15-20 minutes.  Remove from the oven and layer a top coating of mozzarella cheese, 1/2 to 1 full cup, just enough to cover the top.  Put back in the oven for another 10 minutes or until the cheese is melted.  


**For a heartier dish, add 1/2 lb cooked lean ground beef, turkey or soy crumbles. And a word of advice, skip the garlic bread!  Unless you a running a marathon tomorrow morning, no need to carb load! Instead, pair with a mixed green salad with balsamic vinegar or roasted veggies (asparagus, zucchini, brussels sprouts, broccoli rabe, etc...).  And don't forget about your antioxidants...  Baked ziti pairs beautifully with a rich red like Cabernet Sauvignon, Chianti, Pinot Noir, Zinfandel or Shiraz, enjoy!

Sunday, September 26, 2010

Eggplant parmigiana

I know what you're thinking-- Eggplant, AGAIN?!  This girl has a sick obsession with that stuff!!  Well, I am well aware of this vegetable monopolizing the blogisphere, but a) it IS delicious and b) they were only a buck a piece at the Brookline farmer's market, how could I resist!  
Oh and yes, you read that correctly, I've moved back to the city!! Actually since my last post, I've signed a lease and scored an apartment in Cleveland Circle AND started a new (and AMAZING) job... full-time with benefits baby, wooo!  Why do I digress you may be asking yourself.  Well this move does in fact impact your life directly... living in an apartment with no momma to cook or dad to grill can only mean one thing, MORE blogging, win! 
I think the weather may have officially changed for the season and now it's time to pack away your bathing suits and beach chairs, dust off your oven get your apron on!  Tonight I did just that, with a Sunday sauce and eggplant parmigiana.  I make a good sauce, but I am still tweaking and fine tuning-- once I've got it perfected I'll let you in on the recipe, but for now stick with what you know and use what you're used to whether it be grandma's classic sauce or a jar of ragu! (please don't admit to me you use ragu though.)

Eggplant Parmigiana (serves 6)
Ingredients:
3(ish) cups tomato sauce 
1 eggplant, peeled
1/2 cup Italian bread crumbs
1 egg 
1/2 cup milk
1/3 cup flour
1/4 cup fresh basil, chopped
~1 cup mozzarella cheese 


Start by thinly slicing the peeled eggplant in half vertically. Then slice each one in half.
After you've sliced the eggplant, set up a station to bread it.  On one plate, dish out the flour.  In a flat deep dish bowl, add the egg and milk and beat it together.  In the third plate, add the Italian bread crumbs.  Have an extra large plate near by stack all the breaded eggplant.
 Once your all set up, dip each eggplant slice in the flour and shake off the excess.  The flour will help the egg mixture to stick.  Next, dip the floured eggplant into the egg, and lastly hit it with the bread crumbs. 
step 1: flour it

Step 2: dip it in the egg

Step 3: bread crumbs 
Preheat your oven to 350 degrees.  Spray the bottom of an 8x8 inch baking dish with a little non-stick cooking spray, then spoon a little tomato sauce into the dish, you don't need a ton or it'll get too saucy and soggy.  

Then start stacking the eggplant.  Add a little sauce every 2 layers of eggplant, and add a little cheese in the middle.  I didn't measure the sauce or cheese, just look at the pictures and eye ball it.  Just remember, you want to be able to taste the eggplant, not be overwhelmed with cheese and sauce. 
Once the dish is full, spoon a thin layer of sauce onto the top.  Chop the basil and spread it evenly on top, and add more sauce, probably between a half to a full cup.

 
 Bake it in the oven for about 40 minutes, stick a fork through it to see if it's soft.  Remove it from the oven and add the remaining cheese in an even layer.  Bake it in the oven for 5 minutes or until the cheese melts. 
 In lieu of spaghetti, I served the eggplant with roasted Brussels sprouts and a warm baguette. If you like a lot of sauce, add extra once it's plated. 
  I'll blog the roasted Brussels sprouts tomorrow, I never knew I liked them--honestly, I actively avoided them, but then I tried them roasted (in my college dining hall, go figure) and wow, so yummy!  


Monday, July 12, 2010

stuffed peppers

The temperature has finally dropped a few degrees and I know longer fear the wrath of the oven.  So for dinner tonight I made stuffed green peppers, overflowing with  brown rice, ground turkey, zucchini, mushrooms, onions, tomato and peas.  It's loaded with veggies boosting the fiber content-- helping you feel full without loading up on unhealthy calories. 
I must admit though, unlike most of my recipes I don't think this falls under the quick and simple category.  Because stuffed peppers is a multi-step process i.e. cooking the rice, then the turkey, mixing everything together, then baking the peppers I did some of the work last night to shorten my cooking time today.  I prepped all my veggies and cooked the rice last night, leaving only cooking the meat, mixing it all up and baking for tonight. 

Stuffed Peppers (serves 6)
Ingredients:
3 large green peppers 
2 cups cooked brown rice
1 14 oz can stewed tomatoes, No Added Salt if available
1 8 oz can tomato sauce, No Added Salt if available
~1 lb raw lean ground turkey (97% lean)
1/2 zucchini, chopped (about a cup)
1/2 cup mushrooms, chopped
1 cup frozen green peas
1/2 cup onion, coarsely chopped
3 cloves garlic, crushed
salt, pepper, and cayenne to taste
cooking spray
optional: grated or shredded cheese


Start by chopping the zucchini, mushrooms, and onion.  After I did this, I put them all in the same container along with the frozen peas and stuck it in the fridge until I was ready for it.  Next, cut and clean out the peppers.  I was undecided so I cut one pepper length-wise, one width wise, and one just trimming the top.  If I were to make these again, I'd probably just trim the top on all the peppers to get 1 serving per pepper rather than 2, which in turn would boost the calorie content of each serving. 
  Next cook the rice and set aside.  In a big skillet brown up the ground turkey on medium heat and add the fresh garlic.  Drain any excess liquid from the meat then add all the veggies to the skillet.  
Stir to mix up then add the stewed tomatoes and tomato sauce.  Break up any big tomato chunks.  Add the rice, reduce to low and simmer.  Add a pinch of salt, black pepper, and cayenne pepper.  Cook on low for about 10 minutes then remove from heat.
Preheat the oven to 350.  Spray a large baking dish with a little cooking spray.  Stuff each pepper with a heaping scoop of filling and place in baking dish.  Set aside any extra filling. 
Cover the dish with aluminum foil and poke a few holes to allow steam to escape.  Bake for approximately 45 minutes, until peppers soften.  Quickly reheat the extra filling in the microwave or stove-top and top each pepper with another hefty scoop of the rice mixture, evenly atop each pepper until left overs are gone.  Top with a little grated or shredded cheese if you like!

NEW FEATURE:
The recipe (serves 6) contains approximately 200 calories per serving.  If you cut the top off each pepper and make 1 serving per pepper rather than 2 servings,  the filling (as is) will stuff 4 large peppers and boost the calorie count to 310 calories.  This recipe is low in fat and high in fiber. 

Note: calorie count does not include cheese. 

Monday, July 5, 2010

CSF= baked stuffed sole :)

Happy 4th to you!!  It was a great holiday weekend, lots of cookouts and very little cooking in.  So I'll pick up where I last left off... I had just received my first Community Supported Fishery (CSF) share from the Cape Ann Fresh Catch at the Cape Ann Farmer's Market.  Cape Ann Fresh Catch boasts "Local, Sustainably-caught, wicked-fresh fish direct to you"-- cutting out the middle man so all proceeds go directly to the fisherman.  The CSF promises a wide variety of North Atlantic fish including Cod, Haddock, Whiting, Monkfish, and Pollock.  Just two days before my pick-up I read an article in Edible Boston written by Roz Cummins, in which she pointed out some of the flaws of the CSF last summer, one of which being the lack of variety, stating "By the end of the summer I had eaten enough cod to last a lifetime." 
I started to question if this was maybe the wrong decision but being the optimist I am, I headed to the market cooler in tow anxious and excited to receive my first share.  My first pick-up included 5 whole Grey Sole fish, a nice and unexpected surprise.   It's very thin, mild-flavored white fish, and an intimidating fish for my first lesson on filleting.  The fish weren't very big either, only making the task more challenging.  Luckily my Uncle Danny was kind enough to offer his knifing skills and fillet it as I watched.  First he trimmed off the fins and tail, then cleaned each fish to the bone. 

Despite the small size of the fish, I was pleased with the amount of fish we got after filleting.  I rinsed the fish and got to work.  Let me preface this recipe by saying, it is a VERY RARE occasion you will read the word BUTTER in my blogs.  I am a little butter-phobic but there are just some occasions where substitutions just won't due.  And really, what kind of life would this be with no butter or full fat cheese??  Sometimes you just have to splurge and enjoy the finer things in life.  And white fish is a very healthy source of protein, so it's okay to use rich ingredients every now and again, especially when cooking with a lean meat like sole.  But do embrace this butter-loving moment, because they are few and far between. 

Baked Stuffed Sole (serves 6)
Ingredients:
About 2 lbs fresh Sole (rinse in cold water & pat dry)
4 tbsp butter
1 sleeve Ritz crackers, crushed
1/2 large Vidalia onion, chopped

Preheat your oven to 375 degrees.  Melt the butter in a large skillet on medium heat.  Next add the onions.  When the onions start to soften and become translucent add the Ritz cracker crumbs, mix and cook for a minute or two. 
Grease a 9x13 baking dish with a little butter (that's right, MORE butter... about a teaspoon) so the fish doesn't stick to the bottom of the pan.  Layer the fish in the dish.  If the fish has skin, layer it skin-side down.  Once the fish is cooked, the skin will come right off, but you can eat the skin too if you'd like.  Then spread the cracker crumb mixture evenly atop the fish. 

Bake in the oven for about 20 minutes.  It is done when the fish flakes with the touch of a fork.
Drizzle with a little lemon juice and serve with a fresh ear of corn on the cob and you have a deliciously local and sustainable New England meal! 
 Note the little morsel of fried fish on my plate... there was some left over sole that my mom decided to make into real fish sticks.  She coated the fish with a layer of flour, dipped it in egg, coated with another layer of flour and fried in a shallow pan of canola oil.  I had to try it and they were WAY better than anything you'd find in the freezer section!  Stay tuned throughout the summer for weekly local fish recipes!